
The new windows are usually installed by keeping in view the style, energy efficiency, and the type of glass being used. However, working in the background, your house has one unrecognized hero. Flashing in windows looks after your place of residence by keeping out expensive water damage.
Flashing your window helps in ensuring that the cracks between your window and the wall are closed for the moisture that might otherwise sneak in to cause rot and mold. Install it improperly, and you are asking for complications regardless of how good the window itself is.
What Is Window Flashing?
It consists of a thin coating of material applied to direct the flow of water around the orifice of the window and the exterior wall. It is a seal that prevents rain and melting snow from dripping into the frame of your house.
Usual types of flashing are aluminum, vinyl, rubberized asphalt, and butyl tape. It is fitted in the replacement of windows or upon new construction to ensure the sealing is appropriate.
Different kinds of window flashing materials
Window Metal Flashing
- Aluminum is light and doesn’t rust.
- Copper is very strong and also doesn’t rust easily.
- Stainless steel is strong and works well in bad weather.
Flexible Flashing That Can Bend
- Rubberized asphalt is waterproof and sticks well, making sure of a tight seal.
- Butyl Tape: Sticks well and is flexible, making it great for window edges.
Flashing Applied With Liquid
- Best for surfaces that aren’t smooth, it makes a waterproof layer that lasts.
- Perfect for complicated architectural plans and renovations.
Why It’s So Important
Even the most energy-efficient windows are not able to resist without flashing. Any water that works its way through cracks around the window can result in:
- Rotting wood and drywall
- Mold growth
- Insulation damage
- Weakened structural integrity.
Flashing secures your investment and enhances performance, as well as keeps your home safe and dry over the next few years.
Stepwise Process of Installing Flashing Around Windows
Follow the detailed process below to do it effectively:
Check and Prepare Window Opening
The installation of window flashing entails the first step of checking the opening and getting ready to install the window flashing. Cleanse the area around the opening of any loose debris, dirt, and dust. It is necessary to have a clean surface since dust and dirt may adversely affect the adhesion of the flashing membrane.
Check the surroundings of the opening to ensure that there are no gaps or holes. In case any are present, stuff them with spray foam in order to avoid water intrusion paths. Then, brush off the foam with the rasp tool. It also smooths the foam in addition to removing the imperfections and making it ready to apply the flashing material. The surface being rough will assist the adhesive in adhering to the foam.
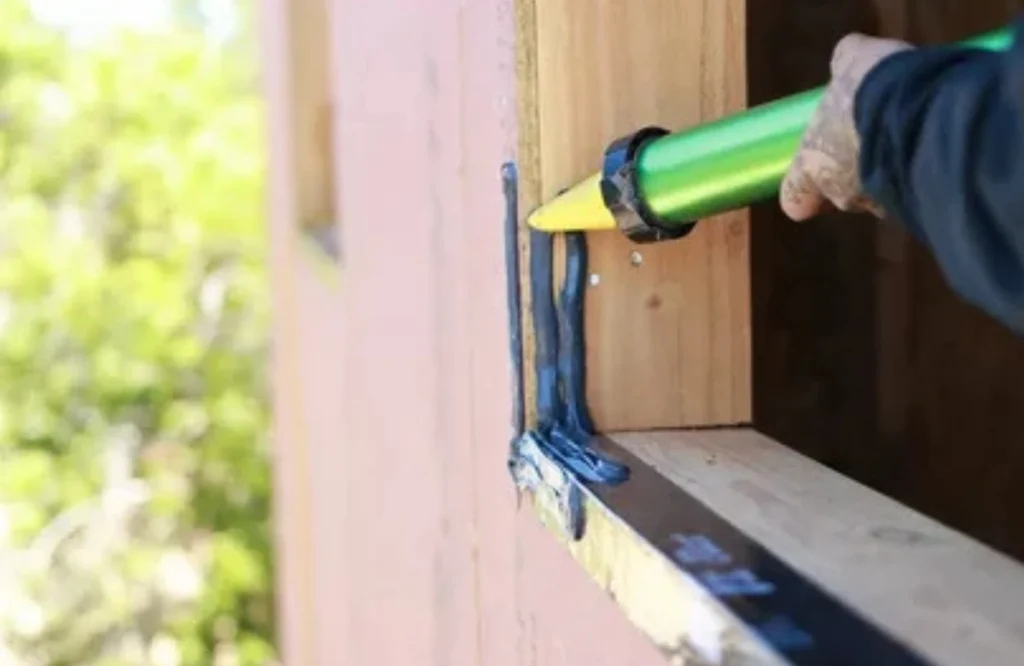
Sealing the Seams
When integrating flashing on windows, the seams of the window opening should be sealed so as to provide a watertight and dependable installation. Apply the seams and gaps around the window opening using a high-quality polyurethane sealant. Apply sealant, and make sure that it goes a little further than the flashing will stop at.
Secure horizontal and vertical seams and go on until you get the concrete surface. These joints are typically weak areas; the joints should be sealed to avoid water and air vapor infiltration. If required, rub the sealant with a caulk to make it a continuous, smooth line.
Installation of the Sill Flashing
When adding window flashing to ICF walls, it is always necessary to start at the bottom and go upwards. By so doing, the top pieces are left to overlap the bottom pieces to allow the water to drain well. You will put the initial bit of sill flashing.
Begin with bowtie-shaped pieces, and fasten these pieces at the corners of the sill. The bowties are needed to provide the right seal and avoid the entry of water since the corners are weak.
Then you can measure and cut your sill piece to fit on your window flashing. Cut it so that it will run at least three inches on either side of the opening of the window. Fold and cut the corner flaps in order to install them smoothly around corners. Place the membrane on the ready sill and read the instructions to prevent the surface adherence of the membrane.
Installation of Flashing on the Sides
Once the sill flashing has been done, comes the side flashing. Make sure that it extends past the sill flashing. Start by measuring and cutting the flashing membrane of each side of the window. It must extend around the flap of the sill piece as well as a few inches above the top of the opening.
Make sure that each side flashing is carefully aligned with the side of the window opening. Apply the flashing to the wall. Do not forget to cut flaps, to fold them down on the opening, and at the top. You also have to make sure that the sill piece gives a watertight cover.
Setting Up Flashing at the Top
Once the sides have been flashed, it is now time to install flashing at the top of the opening. As with the sill, you will require pieces with a bowtie shape that will fit in the corner. After you have cut and stuck those pieces, you can cut the flashing to fit at the top. It is to be borne in mind that the flashing must project several inches on each side of the opening.
The flashing should be laid, and in this case, should be aligned on the top of the window, and then overlap the side pieces. Don’t forget to cut flaps so that you can fold the membrane in and along the edges as with the other pieces. And when that is in position, pound it down so it sticks.
Seal and Install Window
The waterproof membrane on the four sides is in place; now it is time to close around the flashing. Firm your caulk gun and polyurethane sealant to use in the corners of the top and sides. Apply the sealant to form an inverse U shape around the window. Once you are finished with the sealing of the flashing, you may put the window assembly in place.
Flash and Seal the Window
After the window has been installed, cover the top and sides of the flange with flashing material. You would have the top flashing to cover the sides, as you had before. Also, it is significant that the pieces are not limited to the opening. Once the flashing is laid out, apply your caulk gun to close the edges. There you have the last waterproofing around the window.
Window Flashing Details: Mistakes to Watch Out for
- Leaving out the sill flashing, causing standing water and leaks.
- Poor overlaps through which moisture can enter.
- Adhesives that cannot be used interchangeably may be used.
Flashing and Energy Efficiency
Flashing also avoids air leaks, and this helps in enhancing insulation and saving your energy bills. The windows are usually the greatest offenders of heat loss- the flashing assists in getting rid of that poor area by tightening the seal.
Conclusion
Flashing in windows is important for stopping leaks, improving insulation, and making sure the structure lasts a long time. Homeowners should put high-quality materials and proper installation methods at the top of their lists.
Call Hitchcock Roofing and Construction today for experienced assistance and high-quality window solutions that meet Massachusetts building codes.
FAQs
Does the code necessitate window flashing?
Yes, flashing is a requirement of the building codes in most areas. It surrounds the windows to keep moisture out.
Can I use old flashing again when I replace a window?
No, to make sure the window fits and works well, flashing should always be updated when the window is installed.
What happens if flashing is put on the wrong way?
If you don’t perform the flashing well, it can cause water leaks, damage to the structure, and invalidate warranties on both windows and siding.
Do you only need flashing for new windows?
Flashing is needed to adequately seal the aperture for any window, whether it’s new or a replacement.
What kind of window flashing is best?
It depends on the weather and how your walls are built. People like butyl tape and self-adhesive flashing membranes because they are flexible and stick well.